


Spring Boot学习笔记01--基本介绍
摘要
看完本文你将掌握如下知识点:
- 如何搭建一个SpringBoot项目
- SpringBoot自动配置原理
- SpringBoot属性配置方法
- 修改默认的Logback日志为log4j和log4j2的方法
- 修改默认的内置tomcat容器为Jetty容器和Undertow容器的方法
- SpringBoot单元测试方法
- 使用war包运行项目
SpringBoot系列:Spring Boot学习笔记
Spring Boot简介
-
要我给Spring Boot做个定义,简单来说就是一个基于强大的Spring框架的、推崇JavaConfig的极简配置的web开发框架;
-
Spring Boot通过内嵌Servlet容器(Tomcat、Jetty,等等)的方式,可以以jar包的形式独立运行一个web项目;
-
Spring Boot提倡JavaConfig和注解的零配置方式,并且默认配置满足绝大多数场景的需要,意味着少量修改默认配置即可快速搭建一个web项目,极大的提高开发效率;
-
项目中加入某一个
spring-boot-starter-*依赖,就可以引入该功能的完整jar包,降低pom的复杂度 -
本文基于Spring Boot的版本为1.4.2.RELEASE
Spring Boot项目创建方法
-
http://start.spring.io:可以通过网页创建项目结构并下载;
-
Spring Boot CLI:通过命令行的方式创建Spring Boot项目;
-
Spring Tool Suite:习惯Eclipse的用户可以使用STS创建『Spring Starter Project』项目;
-
IntelliJ IDEA:强大的生产力工具,推荐使用,创建『Spring Initializr』项目;
使用IntelliJ IDEA创建一个web项目
-
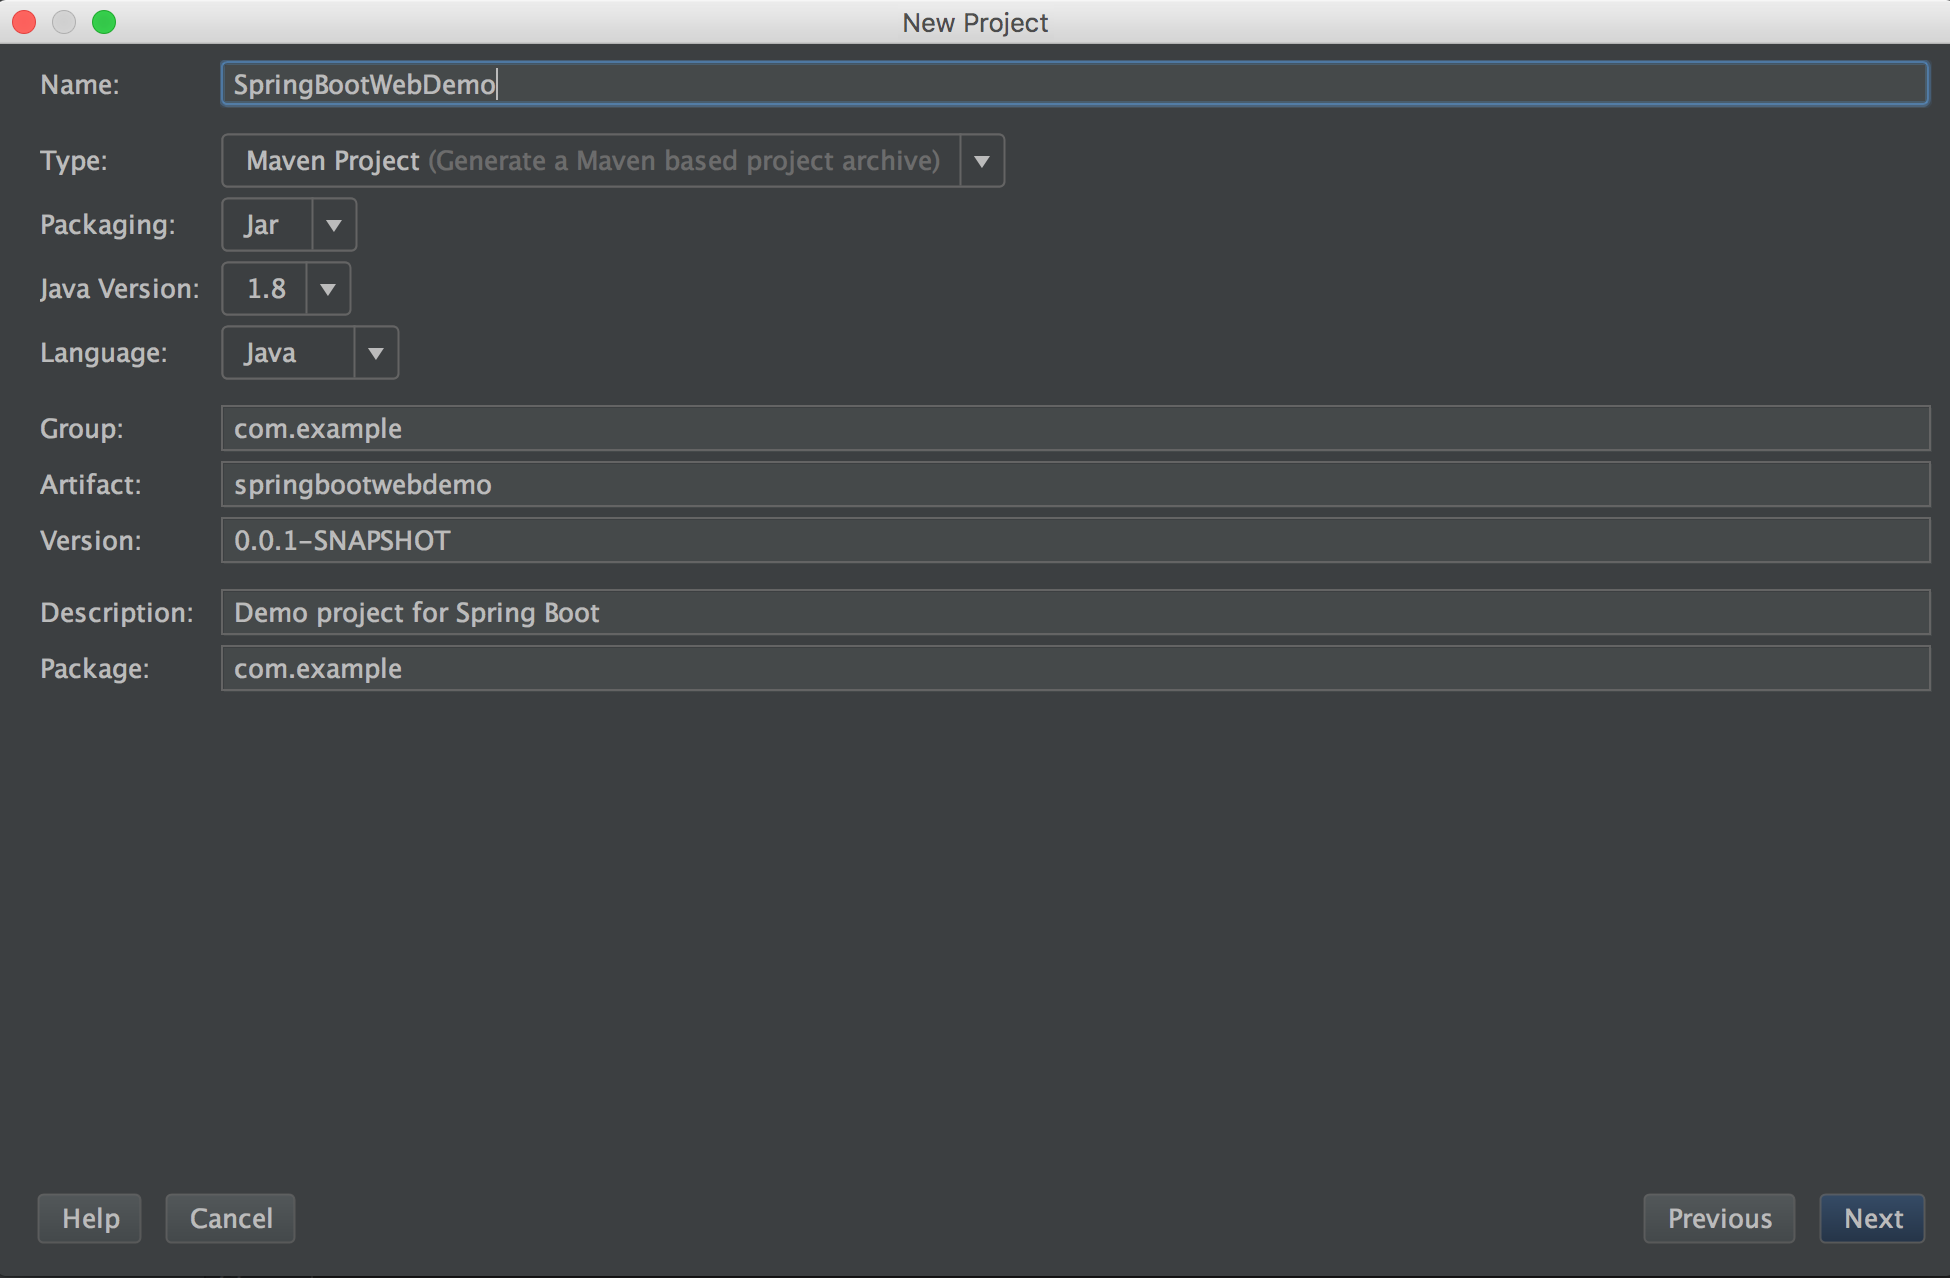
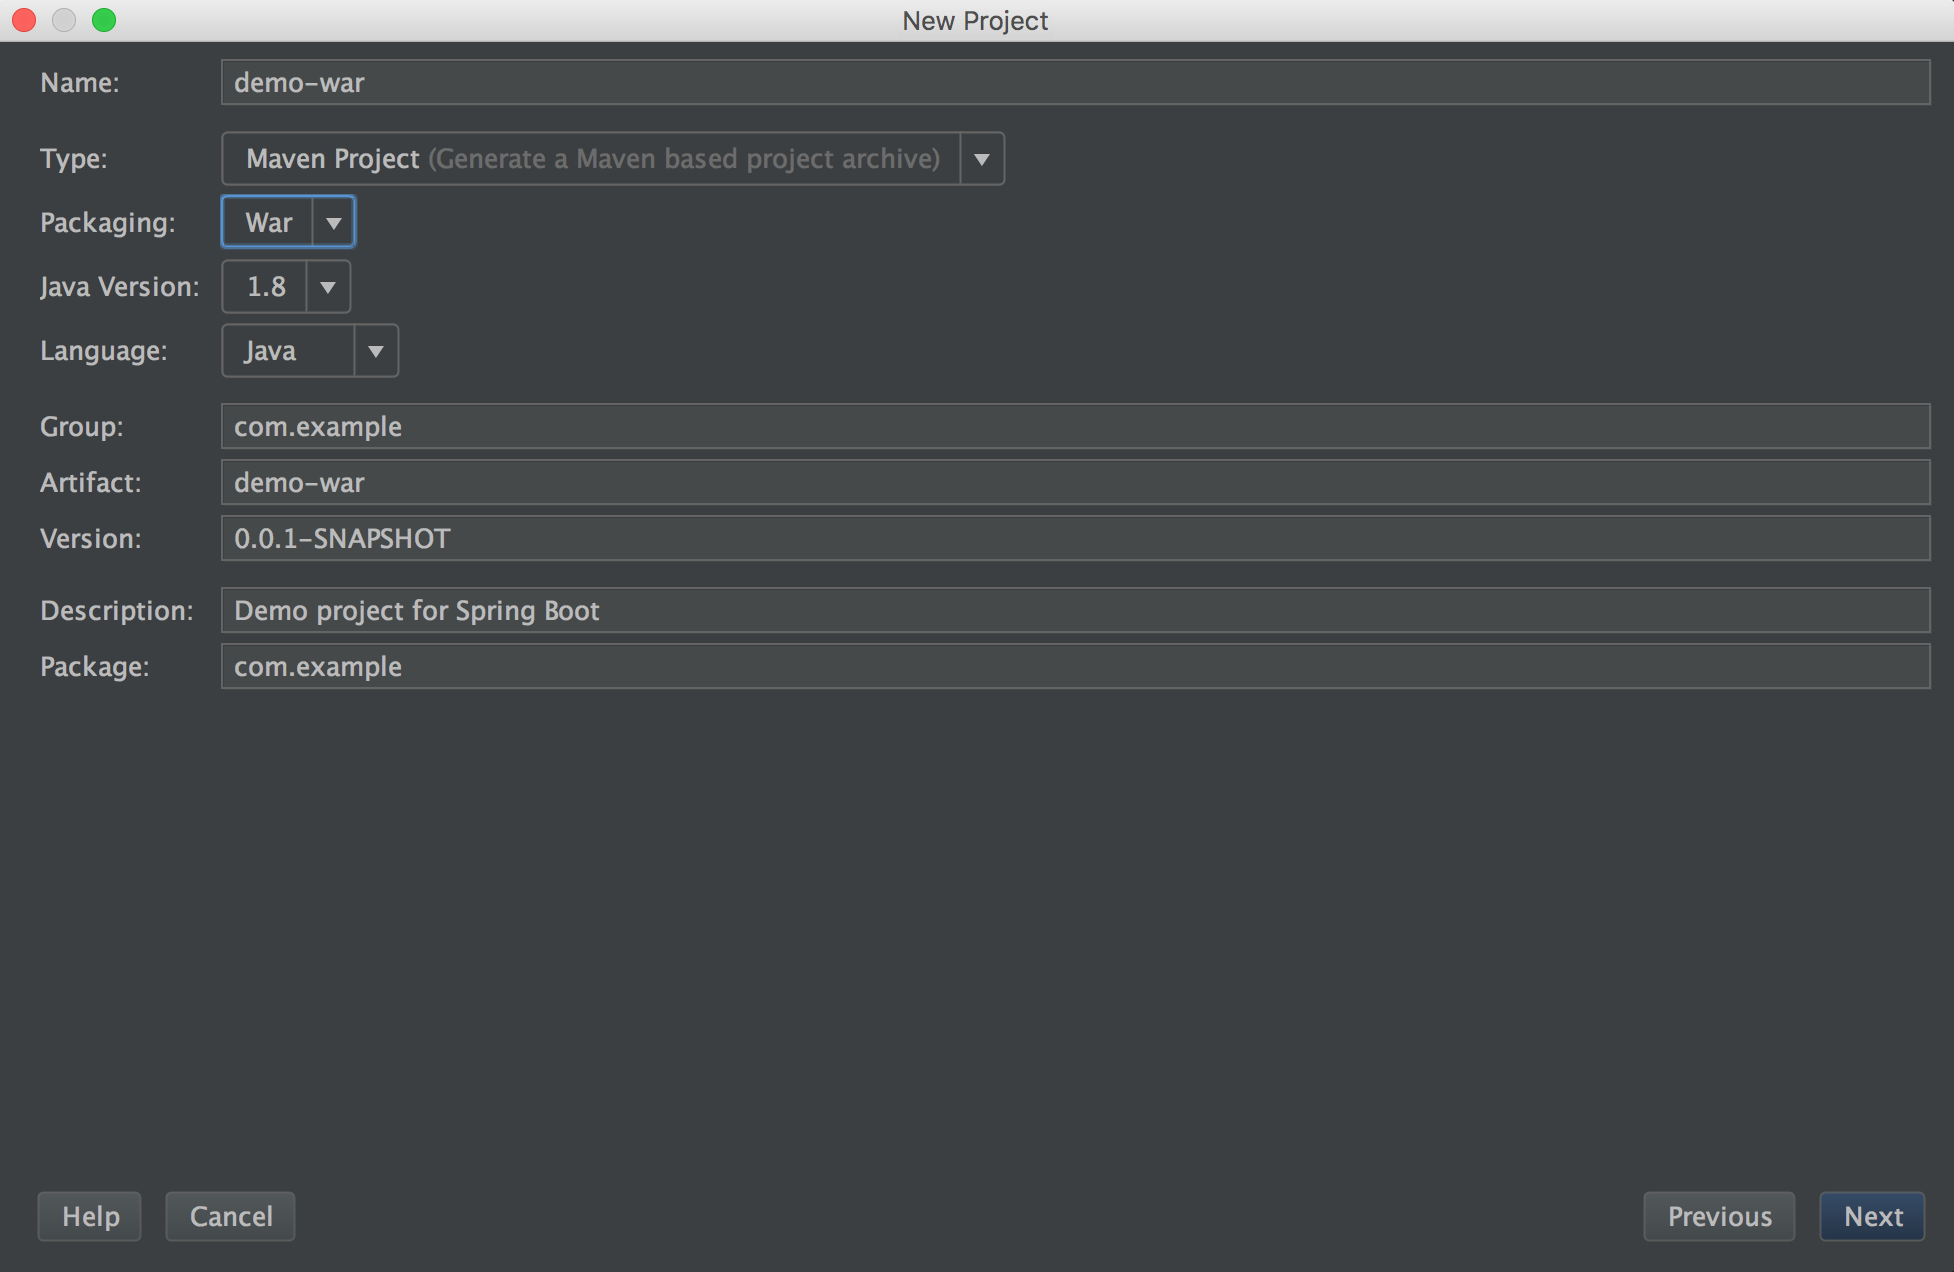
新建Spring Initializr项目

说明:Spring Boot要求JDK1.6+
-
填写项目信息,构建工具使用maven
-
选择项目使用的依赖,这里我们只需要勾选web
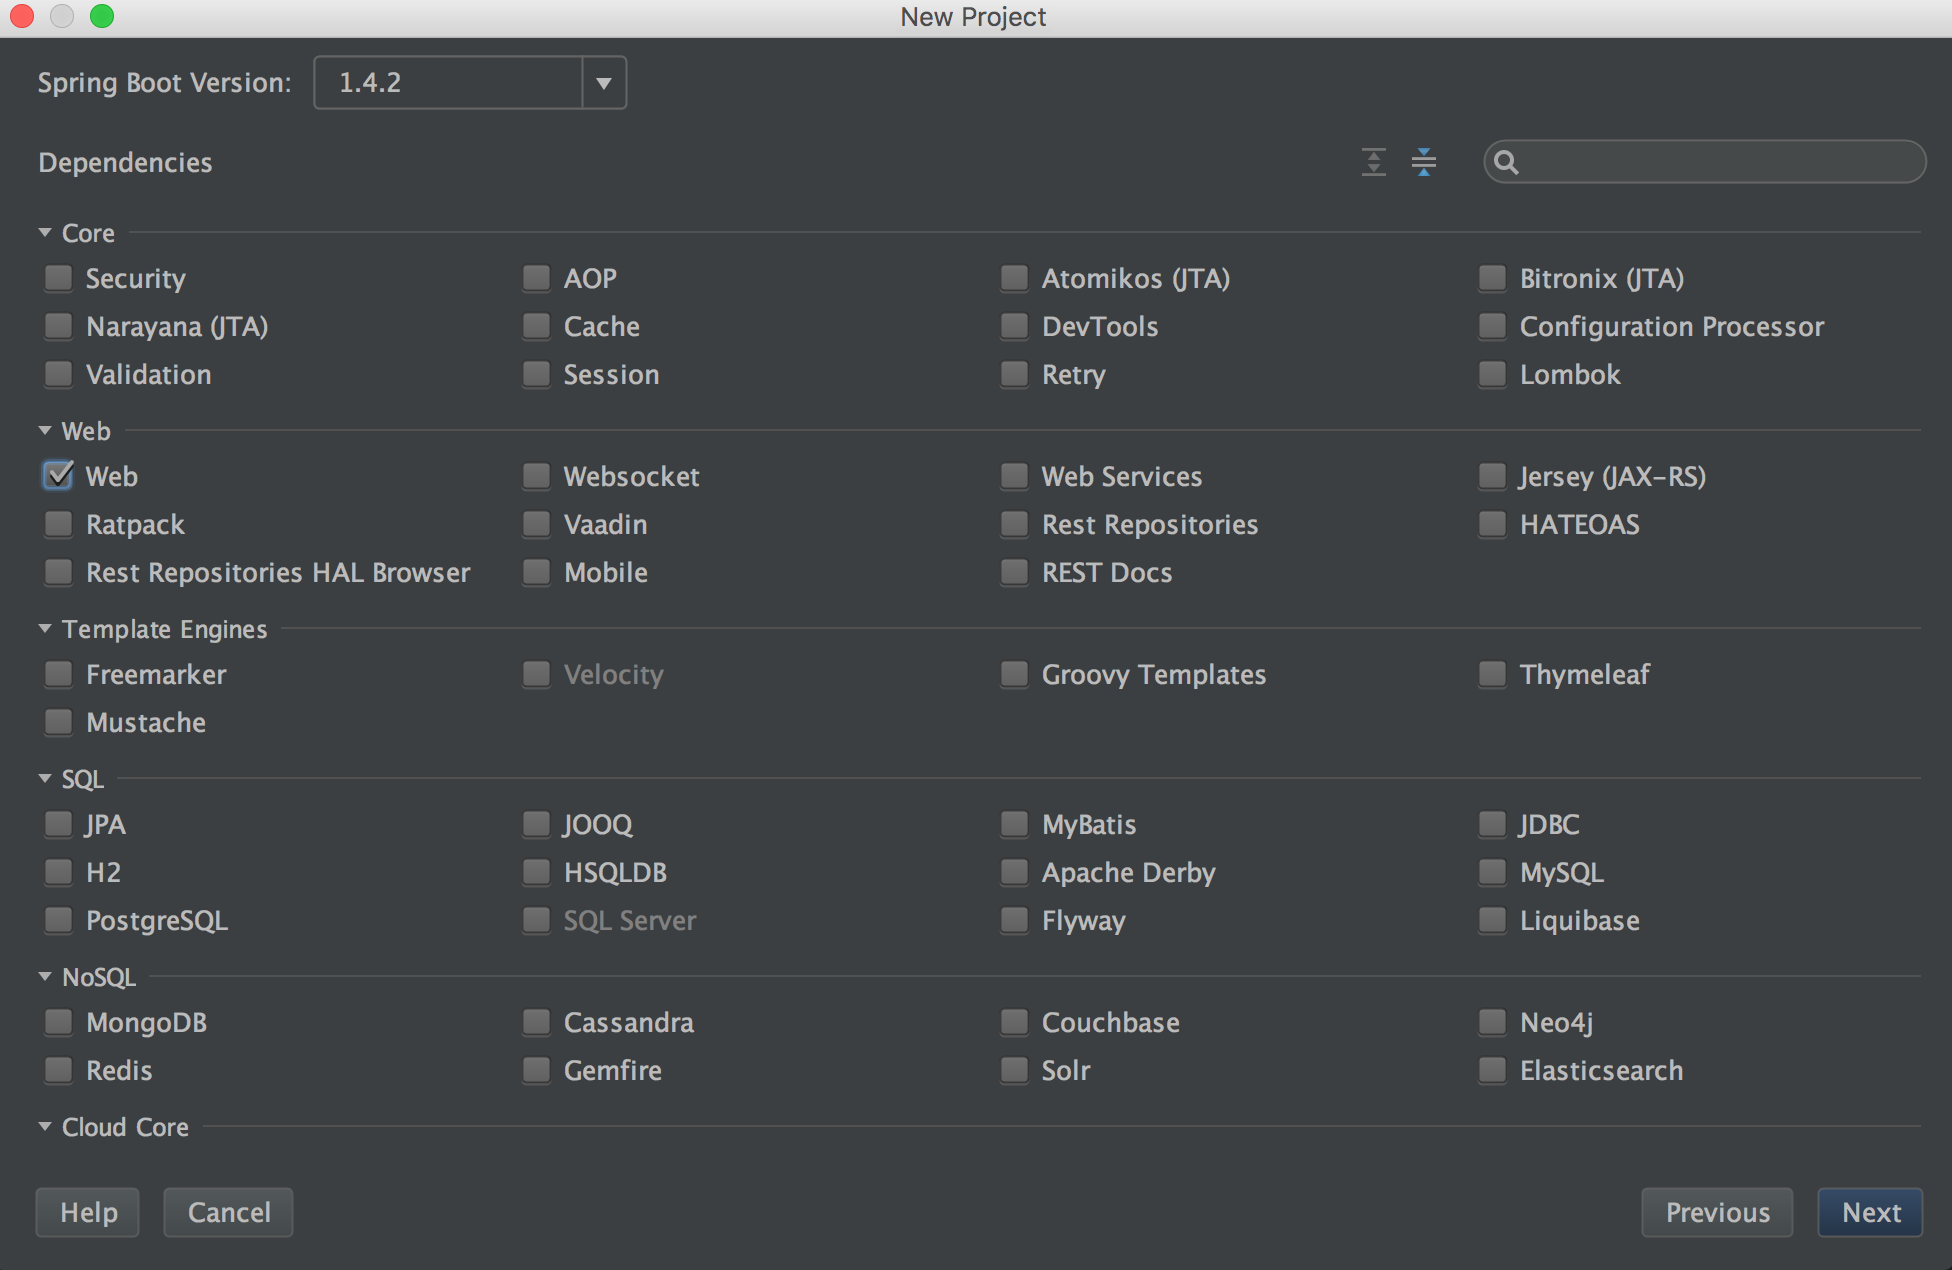
Spring Boot当前最新的稳定版是1.4.2;
所有依赖可以在创建时勾选,也可以在创建后手工将依赖添加到pom中,如果对依赖比较熟悉,推荐手工添加,这样可以加快创建项目的时间;
-
填写项目名称,点击Finish

-
新建的项目结构如下

SpringBoot项目只会在项目根目录下生成一个类–SpringBootWebDemoApplication(artifactId+Application),它就是一个带有main函数的启动类;
1 | package com.example; |
-
pom.xml说明
1 |
|
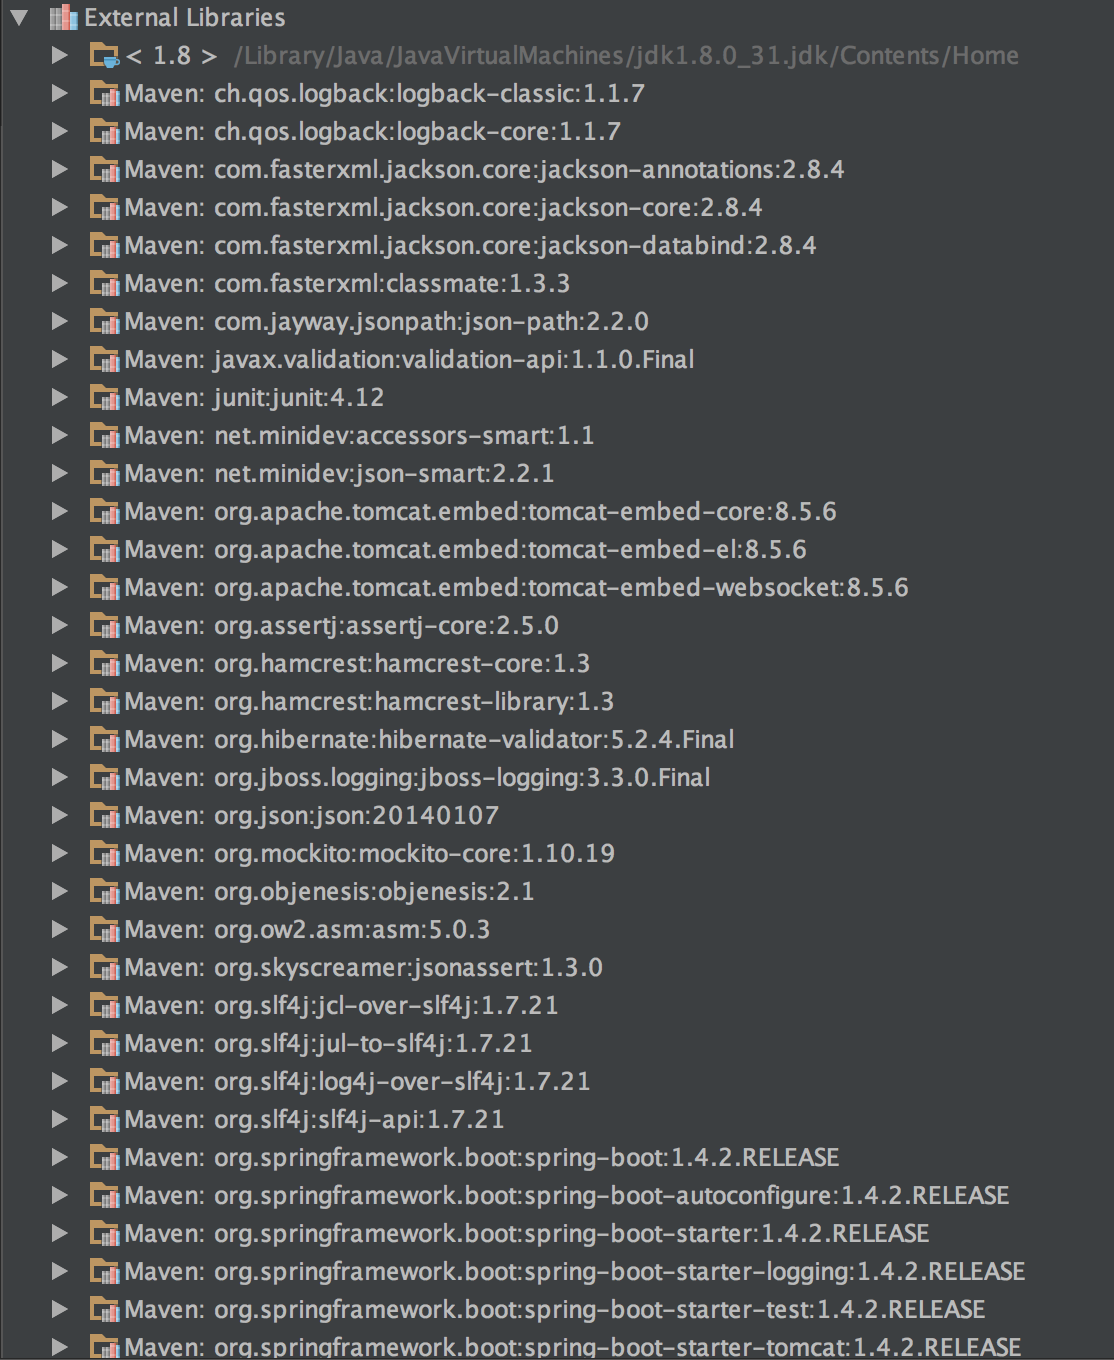
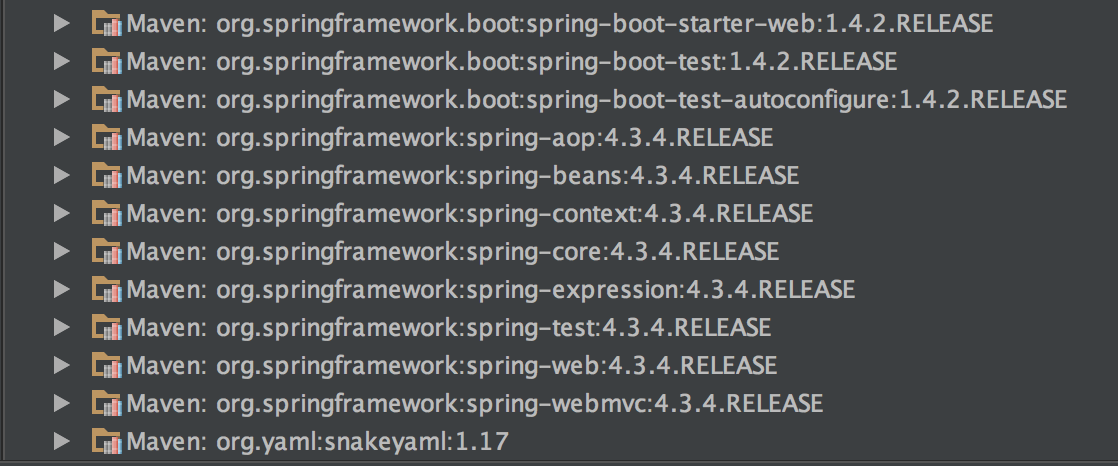
这就是一个web项目的pom文件,可以看到只关联了很少的依赖,这是因为我们继承的spring-boot-starter-parent和关联的spring-boot-starter-web本身已经为我们关联了全部的依赖,如下是该项目所有的依赖包
运行Spring Boot项目
-
maven运行:
mvn spring-boot:run; -
main函数运行:右键单击SpringBootWebDemoApplication,选择『Run 或者 Debug』;
-
推荐安装JRebel插件,支持热部署;
-
当然,也可以maven先打成jar,然后通过命令行执行
java -jar xx.jar;
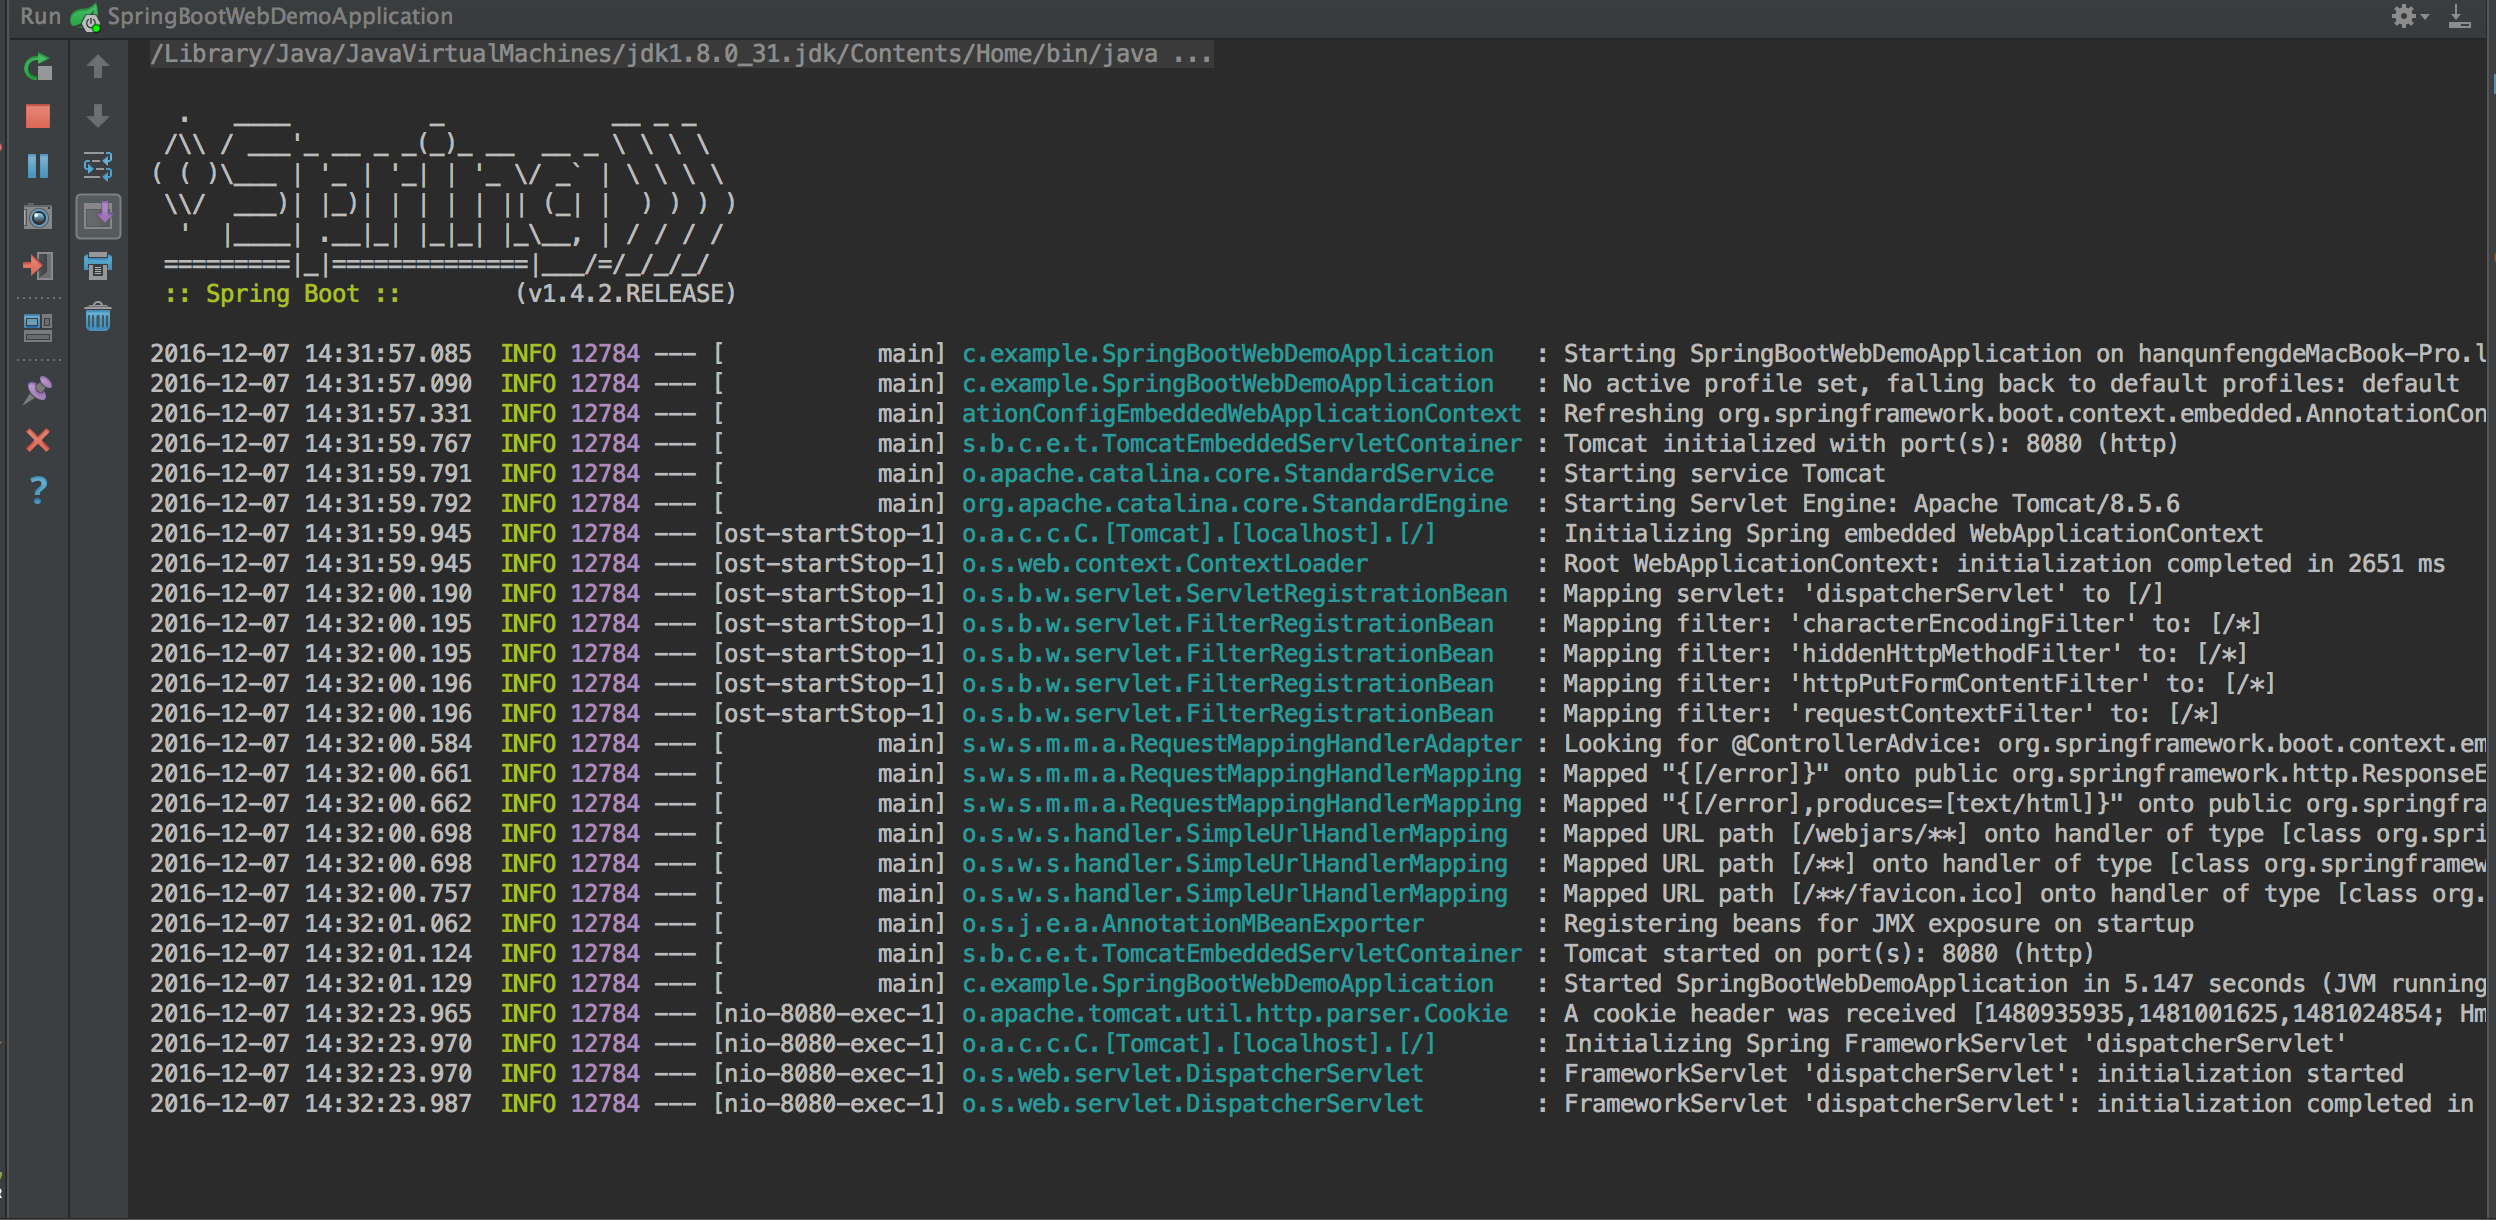
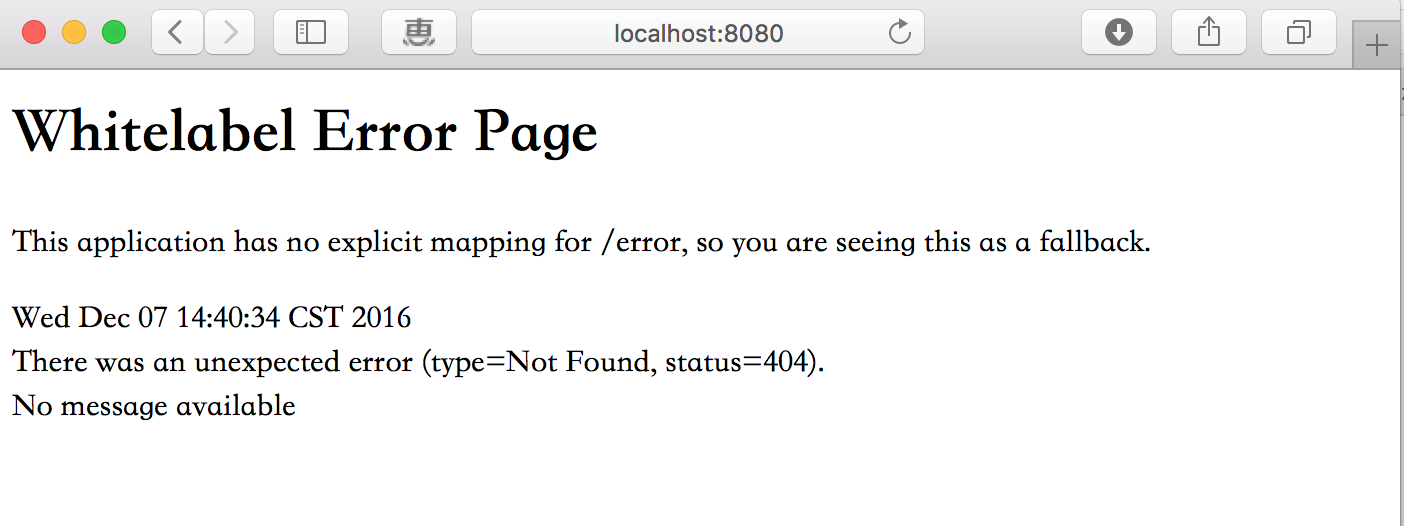
运行成功会看到控制台打印了如下信息
可以看到打印信息中有tomcat的启动信息,说明springboot默认使用tomcat作为web运行容器,这点从上面的依赖包中也可以看到。因为当前项目并没有开放任何服务,所以此时访问8080端口会提示无服务
添加服务
-
我们可以在项目中创建一个Controller控制器,比如DemoController
1 | package com.example.Controller; |
-
运行SpringBootWebDemoApplication,再次访问http://localhost:8080

一切似乎就是那么美好,我们什么都没配置,一个web项目就这样运行起来了,SpringBoot自动帮我们默认了一些常用的配置
自动配置原理说明
SpringBootWebDemoApplication类上的注解:@SpringBootApplication
1 | package org.springframework.boot.autoconfigure; |
-
@SpringBootConfiguration实际上就是@Configuration,说明这是一个JavaConfig
-
@ComponentScan,启用注解自动扫描
-
@EnableAutoConfiguration的作用是根据类路径中jar包是否存在来决定是否开启某一个功能的自动配置,比如,我们项目中添加了spring-boot-starter-web依赖,因其关联Tomcat和Srping MVC,所以类路径下就会存在Tomcat和Spring MVC的jar包,SpringBoot项目扫描到这些jar包后会自动开启两者的配置,当然,这个配置是默认配置,我们可以根据需要进行修改(下文介绍)。
-
exclude和excludeName用于关闭指定的自动配置,比如关闭数据源相关的自动配置
1 |
-
scanBasePackages和scanBasePackageClasses用于指定扫描的路径,默认情况下会自动扫描被@SpringBootApplication注解的类(这里是SpringBootWebDemoApplication)的同级包以及子包中的Bean。比如我们创建的DemoController,因为开启了SpringMVC自动配置,同时又在对应的路径下,所以该Controller会被自动加载。比如我们这里指定扫描的包路径如下:
1 |
再次运行程序,发现原来的DemoController不能被访问了,而『com.temp.Controller』下的controller却可以被访问。
那么问题来了,SpringBoot到底为我们自动配置了哪些功能呢?
-
开启Debug模式,方式有多种:
java -jar xx.jar --debug
在IDE中执行Run时添加VM arguments:
-Ddebug在项目resources下的application.properties文件中增加
debug=true
-
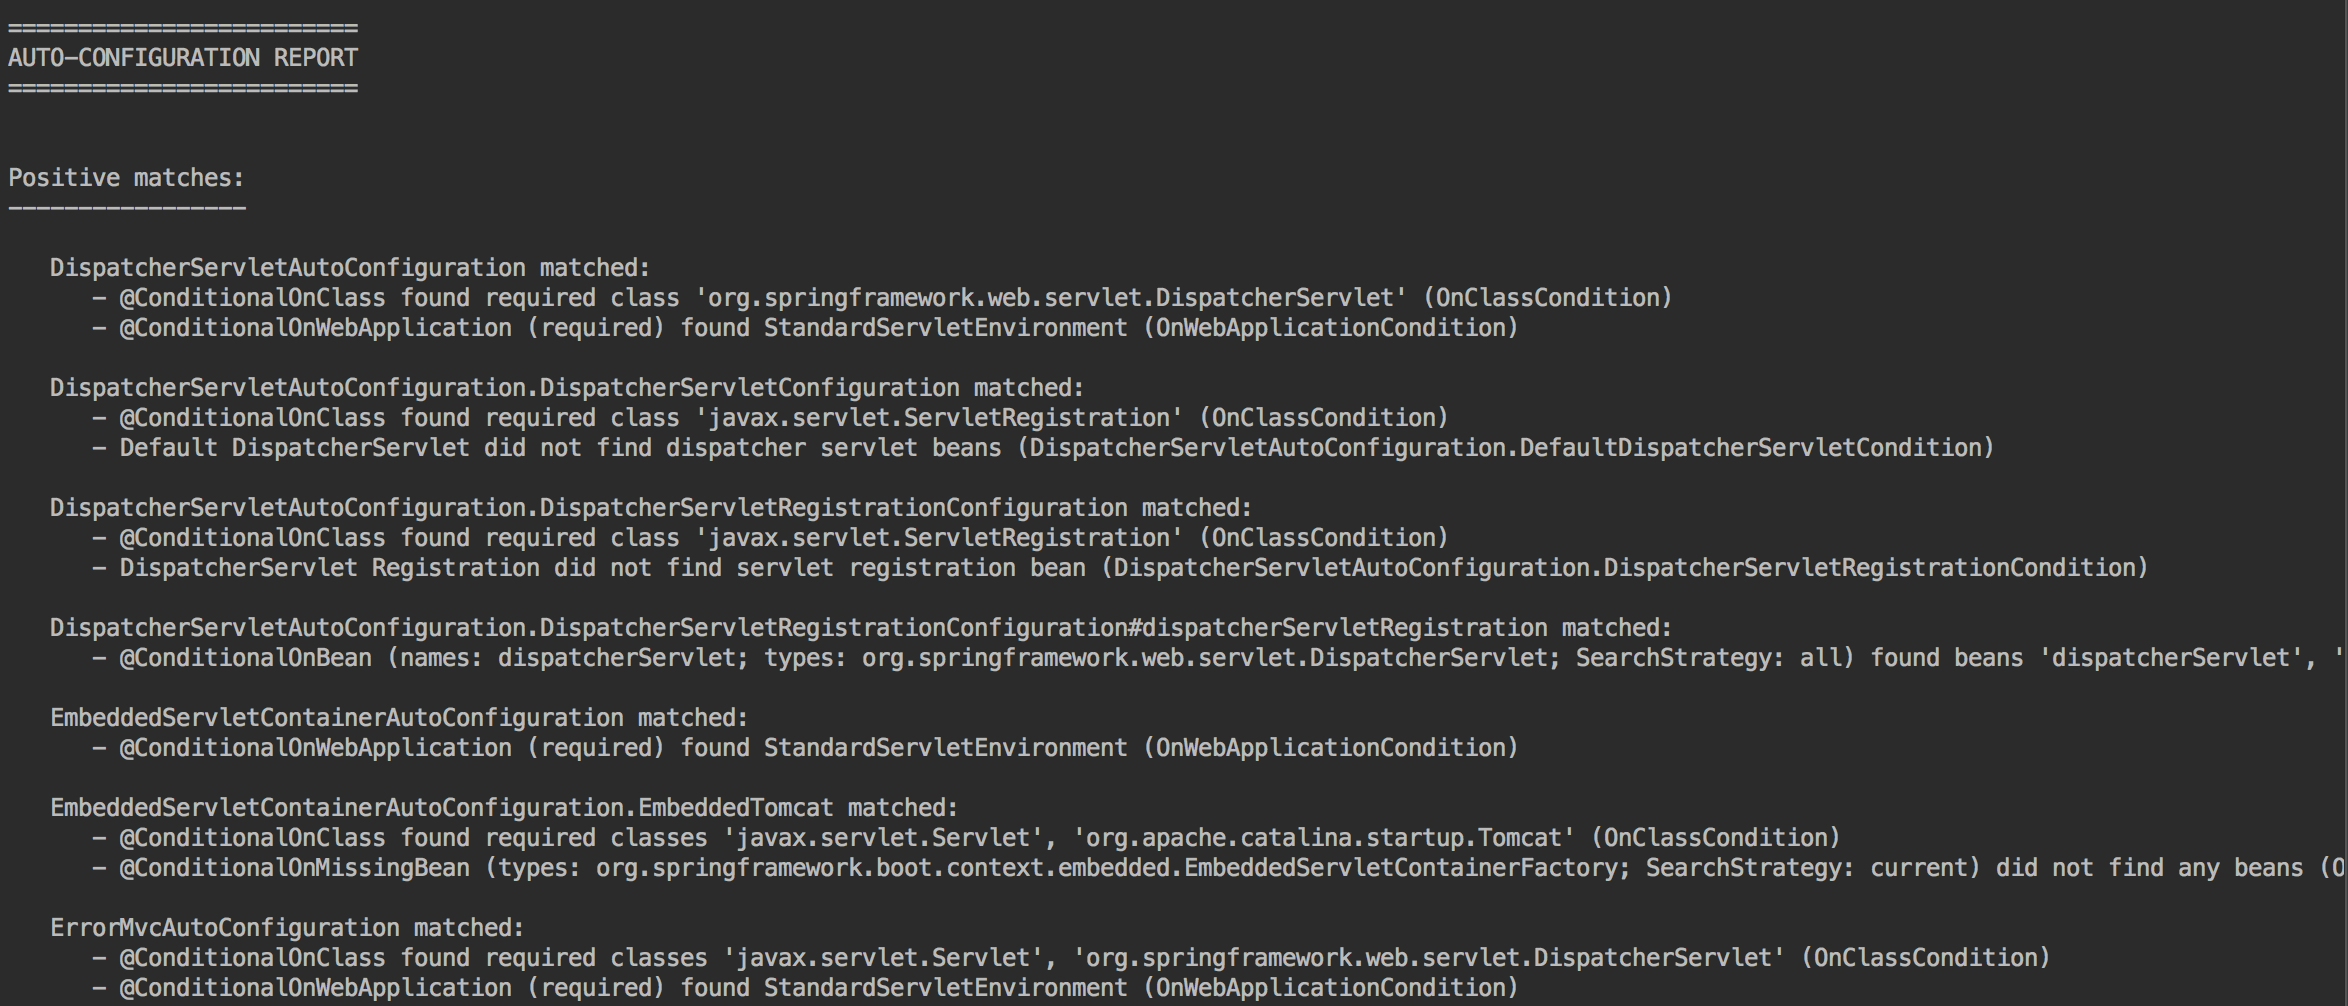
Debug模式运行程序,打印信息中会显示如下内容
启动的自动配置
未启用的自动配置

-
从打印结果中看到,每一个
*AutoConfiguration*都对应着一类功能的自动配置类,比如HttpEncodingAutoConfiguration:
1 | HttpEncodingAutoConfiguration matched: |
-
开启的自动配置中都会有
@ConditionalOnClass、@ConditionalOnWebApplication等标识,这是什么意思呢?为了弄清楚这个,我们需要先来认识一下@EnableAutoConfiguration;
@EnableAutoConfiguration
1 | package org.springframework.boot.autoconfigure; |
-
这里我们需要了解一下@Import注解中的EnableAutoConfigurationImportSelector
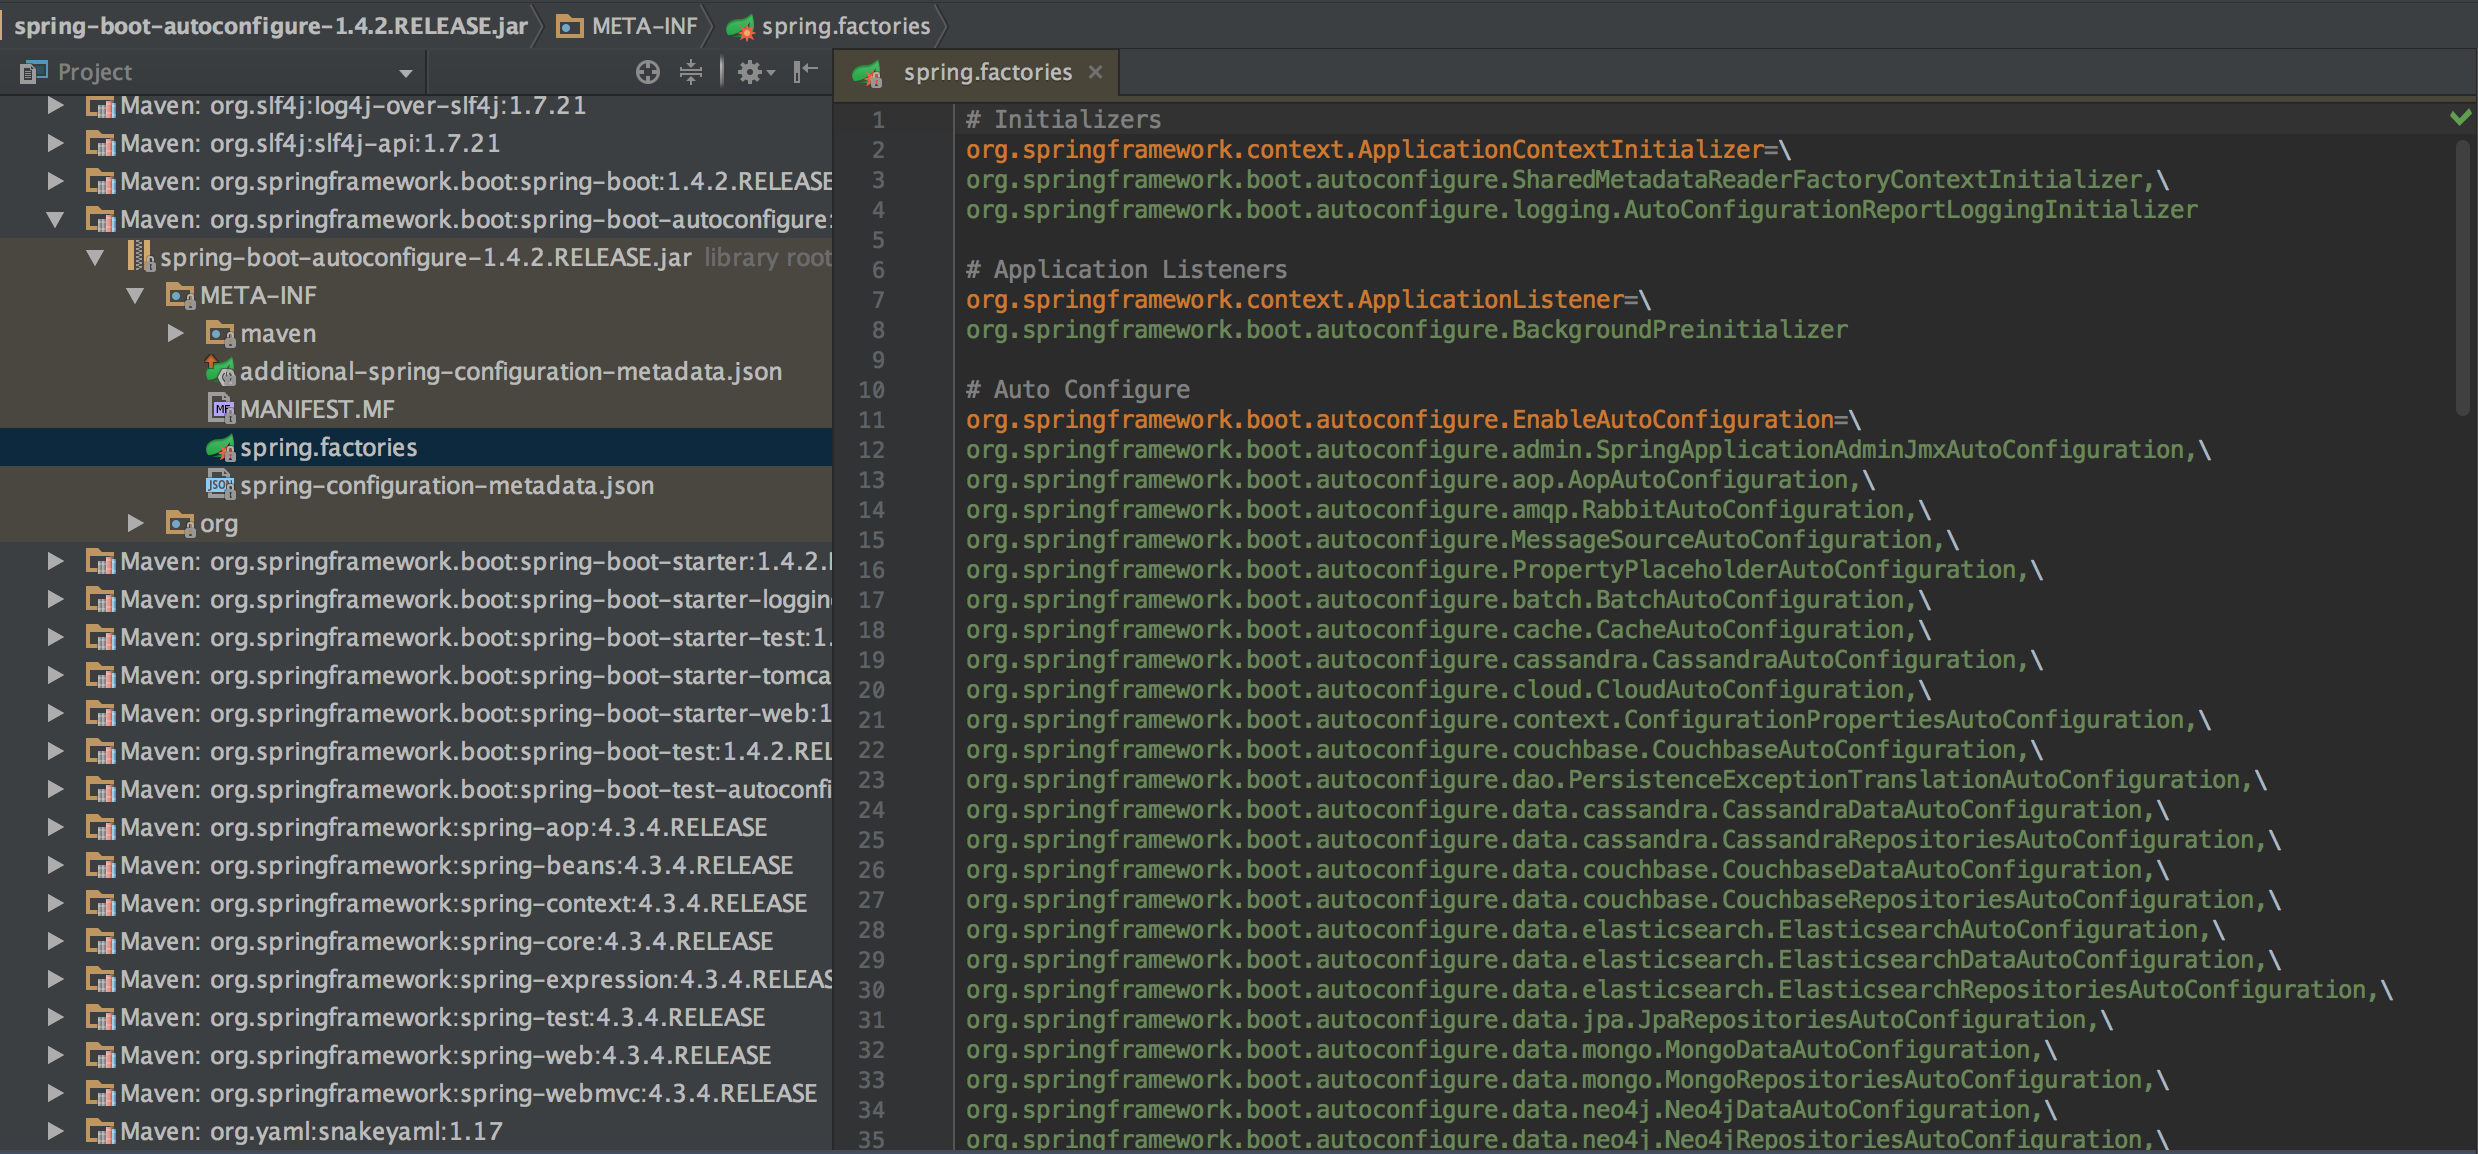
感兴趣的可以看一下源码,大体的功能就是扫描jar包里是否含有
META-INF/spring.factories文件;
并在spring.factories中找到**@EnableAutoConfiguration的全路径名称org.springframework.boot.autoconfigure.EnableAutoConfiguration**这个key,该key对应的value就是用于声明都需要启用哪些自动配置类;
比如spring-boot-autoconfigure-1.4.2.RELEASE.jar中就有一个spring.factories,可以看到org.springframework.boot.autoconfigure.EnableAutoConfiguration参数中列出了自动配置类列表,而HttpEncodingAutoConfiguration这个自动配置类就是其声明的;
HttpEncodingAutoConfiguration
-
先看下源码
1 |
|
-
熟悉JavaConfig的都会明白,这就是一个配置类
@Configuration,并且通过@Bean注册了一个CharacterEncodingFilter;
但是还有一些注解,是什么意思呢,我们分别说明:
-
@EnableConfigurationProperties:开启属性注入
本例中表示HttpEncodingProperties是属性类,并使用@Autowired自动注入;
属性类实际上是一个是注解了@ConfigurationProperties的JavaBean,SpringBoot将属性文件(application.properties)中的键值对与JavaBean的属性建立起一一对应关系:
1 |
|
所有**@ConditionalOn**开头的注解都是用于进行条件判断的
-
@ConditionalOnWebApplication:当前项目是web项目的条件下才加载当前配置类
-
@ConditionalOnClass:当类路径下有指定的类的条件下才加载当前配置类
1 | //本例表示,当前类路径(含jar)下必须存在CharacterEncodingFilter |
-
@ConditionalOnProperty:当指定的属性等于指定的值的情况下加载当前配置类
1 | // spring.http.encoding=enabled |
-
@ConditionalOnMissingBean:当前容器里没有指定的Bean的情况下
1 | // 如果当前容器中找不到CharacterEncodingFilter实例,则创建当前的Bean |
通过上面的分析,应该可以明白SpringBoot是如何做到自动配置的,简单总结如下:
-
@SpringBootConfiguration实际上就是@Configuration,说明这是一个JavaConfig
-
@EnableAutoConfiguration负责扫描jar包中的
META-INF/spring.factories来找到要初始化的各种AutoConfiguration类 -
各种@Conditional注解决定哪些Bean可以被容器初始化
-
如果希望进一步了解SpringBoot的自动配置,建议查看每一个AutoConfiguration类的源码
除了上面介绍的,@Conditional注解还有如下形式
-
@ConditionalOnExpression:基于SpEL表达式作为条件判断
-
@ConditionalOnJava:基于JAVA版本作为判断条件
-
@ConditionalOnJndi:在JNDI存在的条件下查找指定的位置
-
@ConditionalOnMissingClass:当前类路径下没有指定的类的条件下
-
@ConditionalOnNotWebApplication:当前项目不是web项目的条件下
-
@ConditionalOnResource:类路径下是否有指定的值
-
@ConditionalOnSingleCandidate:当指定的Bean在容器中只有一个的情况下
如果我们希望自己创建一个自动配置类(AutoConfiguration),则只需要在我们自己创建的JavaConfig中加上**@ConditionalOn**注解,并且在类路径下创建META-INF/spring.factories,加入参数org.springframework.boot.autoconfigure.EnableAutoConfiguration=xxxxAutoConfiguration
SpringBoot的配置文件
-
SpringBoot支持常规的properties配置文件(application.properties),还支持yaml语言的配置文件(application.yml)
-
SpringBoot会从classpath下的/config目录或者classpath的根目录查找application.properties或application.yml
-
如果要修改SpringBoot自动配置中默认配置,可以通过在配置文件中配置相应的参数即可
-
比如,项目启动时,tomcat默认的端口号是『8080』,访问路径是『/』,修改如下:
-
application.properties
1 | server.port=8081 |
-
application.yml
1 | server: |
-
IntelliJ IDEA支持对properties和yml的代码提示功能,编辑起来还是很方便的,不需要特别记住这些属性名称
-
SpringBoot默认使用priperites进行配置
SpringBoot的属性可以通过多种方式指定,配置文件只是其中一种方式,常用的方式还有如下几种,按加载的优先级列出:
命令行参数:
java -jar xx.jar --server.port=8081 --server.context-path=/demo
操作系统环境变量:有些OS不支持使用.这种名字,如server.port,可以使用SERVER_PORT来配置。
项目中的配置文件:application.properties或者application.yml
项目依赖jar包中的配置文件:application.properties或者application.yml
关于SpringBoot支持的配置属性可以查看官网地址1.4.2.RELEASE
Profile配置
-
不同的环境可以使用不同的配置文件,application-{profile}.properties,比如
开发:application-rnd.properties
测试:application-release.properties
验证:application-verify.properties
生产:application-prod.properties
-
通过在application.properties(项目中必须包含该文件)中设置
spring.profiles.active=prod来指定启用哪一个Profile。
关于属性配置还想多说的一些内容
-
application.properties也可以配置自定义属性:my.name=hanqf
-
通过
@Value将属性注入Bean属性
1 |
|
-
通过
@ConfigurationProperties将属性注入Bean对象
使用prefix
1 | my.name=hanqf |
1 |
|
不使用prefix
1 | name=hanqf |
1 |
|
-
属性占位符
1 | app.name=MyApp |
-
属性名匹配规则
1 |
|
firstName可以使用的属性名如下:
1 | person.firstName,标准的驼峰式命名 |
日志配置
-
Spring Boot默认使用Logback作为日志框架,这是推荐的方式,如果希望修改为熟悉的log4j可以看下文
创建项目时我们引入了
spring-boot-starter-web,其依赖spring-boot-starter,spring-boot-starter又依赖于spring-boot-starter-logging,该依赖内容就是Spring Boot默认的日志框架Logback
Logback相关设置,可以在application.properties中进行如下配置:
1 | # 日志文件路径 |
当然,也可以直接将自己的
logback.xml放到项目根路径下
-
修改为log4j框架
pom中排除对spring-boot-starter-logging的依赖,并加入对spring-boot-starter-log4j的依赖
目前maven中央仓库的最新版本是1.3.8.RELEASE
1 | <dependency> |
项目根路径下添加log4j.properties
-
修改为log4j2框架
与log4j类似,修改pom,增加spring-boot-starter-log4j2依赖
目前maven中央仓库的最新版本是1.4.2.RELEASE
1 | <dependency> |
项目根路径下添加log4j2.xml
说明
这里需要说明一个问题,如果切换为其它log框架,debug=true将会失效,需要在各自的log配置文件中声明,比如log4j需要添加log4j.logger.org.springframework.boot=debug
修改内置Tomcat为Jetty
-
修改pom,去除
spring-boot-starter-tomcat的依赖,增加spring-boot-starter-jetty依赖
目前maven中央仓库的最新版本是1.4.2.RELEASE
1 | <dependency> |
-
application.properties中的属性配置与tomcat一致
修改内置Tomcat为Undertow容器
-
修改pom,去除
spring-boot-starter-tomcat的依赖,增加spring-boot-starter-undertow依赖
目前maven中央仓库的最新版本是1.4.2.RELEASE
1 | <dependency> |
-
application.properties中的属性配置与tomcat一致
单元测试
-
创建一个单元测试的抽象父类,用于初始化必要的对象
1 | package com.common; |
-
继承抽象父类,并实现测试逻辑
1 | public class SpringBootWebDemoApplicationTests extends SpringBootTestParent{ |
使用war包的形式运行项目
上面我们介绍了SpringBoot通过jar的形式运行项目的方法,这也是SpringBoot推荐的方式,因其内置Servlet容器,所以发布和部署都非常方便,但是某些情况下(比如使用JSP作为VIEW层,内置容器的形式并不能支持),我们希望将web项目部署到自己的容器中,这时候就需要将SpringBoot项目打成war包部署,有两种方式:
1.创建项目时打包方式选择:war
war项目目录结构

2.将原打包方式为jar的项目修改为war形式
与war项目对比发现,通过修改如下内容,可以将jar项目修改为war项目
2.1 pom中将<packaging>jar</packaging>==><packaging>war</packaging>
2.2 pom中添加tomcat依赖,显示声明scope为provided,这样打包时就不会将tomcat的jar包打到war中
1 | <dependency> |
2.3 创建ServletInitializer类
1 | public class ServletInitializer extends SpringBootServletInitializer { |
说明
-
Servlet3.0规范,支持将web.xml相关配置也硬编码到代码中,并由
javax.servlet.ServletContainerInitializer的实现类负责在容器启动时进行加载 -
spring提供了一个实现类
org.springframework.web.SpringServletContainerInitializer,
该类会调用所有org.springframework.web.WebApplicationInitializer的实现类的onStartup(ServletContext servletContext)方法,从而将相关的容器组件注册到容器; -
SpringBootServletInitializer就是WebApplicationInitializer的实现类;
-
我之前写过一篇SpringMVC4零配置的文章,对零配置感兴趣的同学可以参考。